A little about me: I got into Warhammer 40,000 in October-ish of last year. It's something that had always intrigued me, as I loved the universe as presented by the Dawn of War and Space Marine video games, and painting little plastic figurines seemed like it'd be really fun. The reason for my delay in launching this blog is two-fold: I was not in a stable living situation, and I was also learning how to do it on a professional level, honing my skills til I felt comfortable enough I'd actually be able to get hits and get subscribers. Alack, the internet age.
There's always room to learn, and that's HOPEFULLY a lot of what my blog will be about. If I learn new techniques, which I will considering I've only been at this for about a year, I will do my best to present it to you all in a way that teaches and shows you the struggles of doing for the first time as an aspiring professional myself.
If you want to commission anything, anything at all, e-mail me at lantz.casey@gmail.com. I work cheap! Making a living is hard! Prices negotiable, and I usually charge about $15 for your typical 15mm scale miniature. I actually enjoy painting things for others way more than working on things I personally own. Watching someone's face light up as I present them with ultimately what captures their imagination is a great feeling.
And now on to my latest work!
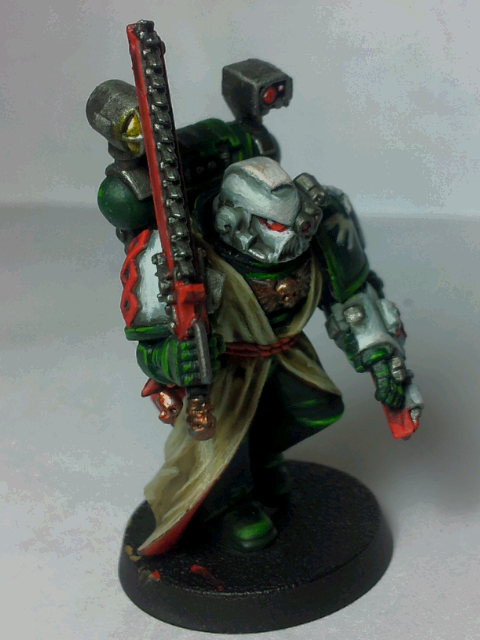
I've been quite busy painting my Dark Angels command squad recently. After a 2000 point game against my Black Templars playing friend, my love of the game motivated me to get back to doing things for myself. My command squad was actually 3/5ths finished already, it was just the Apothecary and Champion still to go, but busy life got in the way.
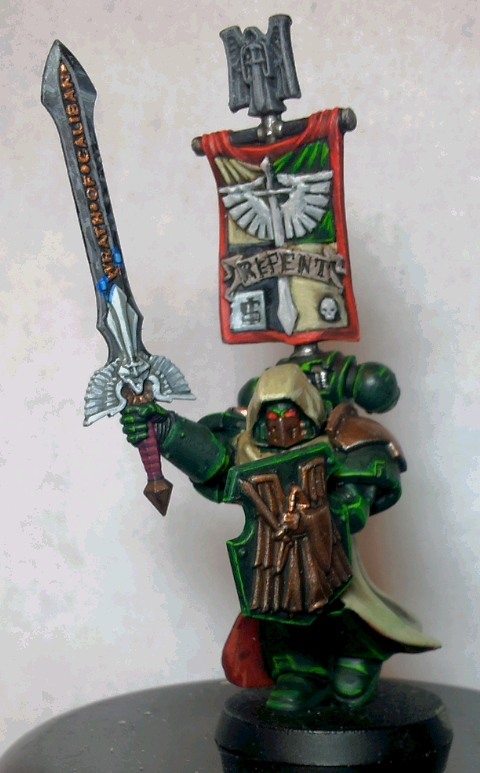
Couldn't be happier with how they came out. I hadn't ever tried to paint white on armor before (I'd only ever used it as a highlight in sparing use like the angel on the sword of my champion) so seeing it turn out like that makes me happy. Also, I finally have a brush that's not falling apart on me that's also needle small enough I can comfortably do tiny detail work, like the glint of white light on anything glass (the eyes of the Apothecary being the best example you can see here) and writing lettering like the REPENT on the Champion's banner.
The champion's banner, by the way, took as much time as the entire rest of the miniature combined. The dark angels symbol was part of the casting of the model, and it also had the little skull and little extra box in the two corners. I had to quarter the inside myself, couldn't be happier with how that turned out. It's almost to the point I want to revisit the knee pads of my original squads I painted up now that I can quarter things free-hand like that, but I kind of like not going back to older models and letting their original paint jobs stand where they are. Lets me show people how far I've come, you know?
And I know some people are probably saying, "But Casey, those are not finished yet." And you're correct. Those are simply the immediate-aftermath-painted pictures I always take.
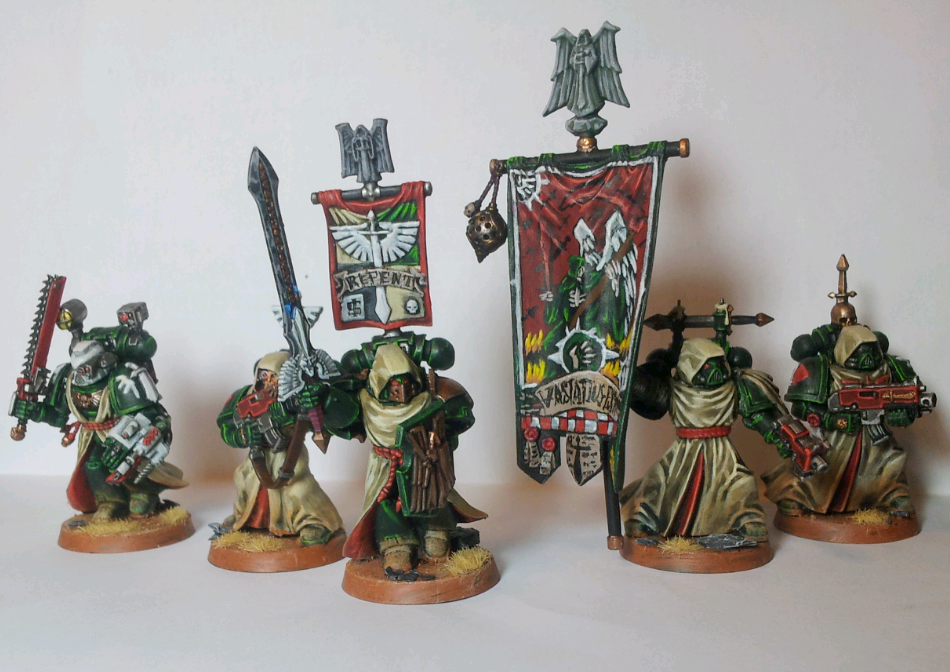
I decided to do the basing together as a whole squad, and then just take one photo of them all grouped up.
Here's the whole squad together. Mmmm, lovely. They look proper dire and angry, as any good space marine should.
Basing is pretty simple, really. At least to the degree to which I do it. I don't like overly complicated bases at least for models that see play on the table. All I do is paint on some dirt, drybrush it with a bone-light shade and then a light-green shade (Terminatus Stone and Underhive Ash respectively out of the Citadel paint line), and then glue on some dead grass flock, and little cracked slate. After that dries, I paint the rocks with my darkest grey, then apply a black wash, then highlight with a single bright shade of grey. Simple, effective, easy to do, and it looks like the deserts of my home in Nevada.
Something that's kind of fun to do and you can see it prominently on the Champion, drybrush on the colors used when painting the bases. It makes the boots look muddy/dirty, etc. I also did it with the robes as they would be dragging through it to.
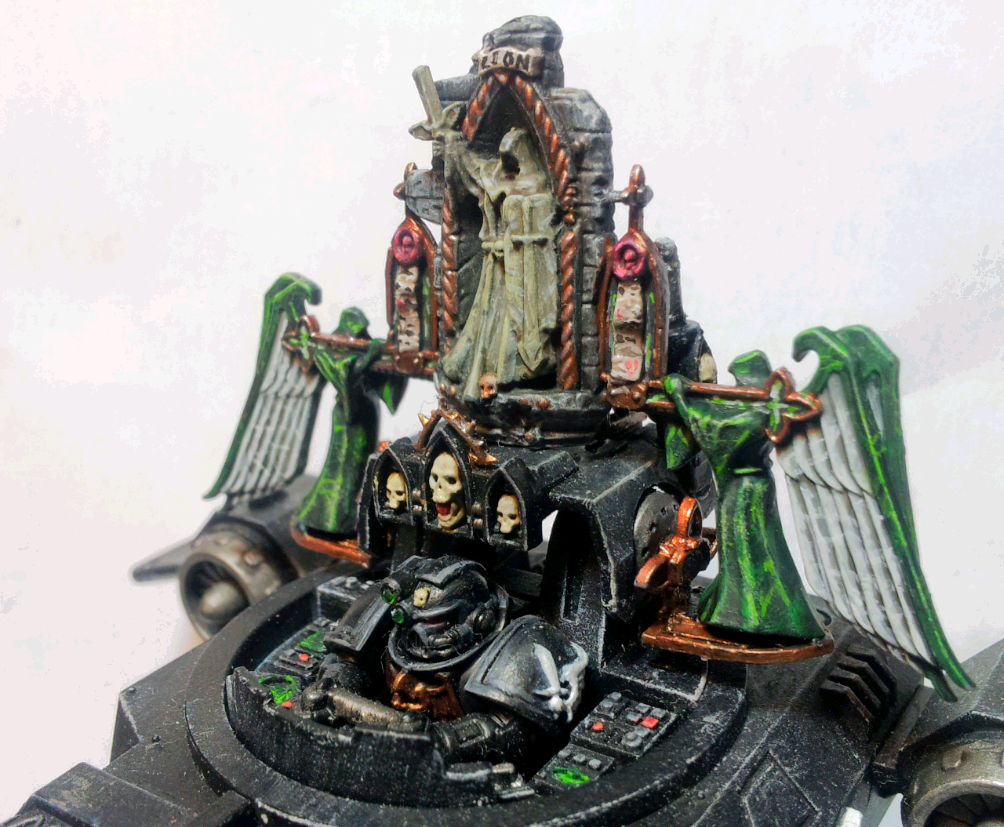
Finishing the squad felt good. I think the rest of them were sitting around for about two months, waiting for their brethren to join them as completed models. Then I realized I had another model that was unfinished! Awhile ago, I bought the "Land Speeder Vengeance/Darkshroud" box and magnetized it to run as either option. I never did get around to finishing the Darkshroud's "Icon of Old Caliban" which is basically a giant statue thingy on the back of the model. It's pretty ridiculous-looking, but I love it. My friends and I refer to it lovingly as the Battlepulpit.
And now it's painted and sexy-like.
I absolutely love how this came out! I wanted the angel statues to look like Jade or Marble. First thing was to make sure it was DARK so I applied two coats of black wash to the angels after I painted it with my darkest green (Caliban Green for those familiar with the Citadel line), so I applied a lot of streaks of the brightest colors I used outside of where I'd normally apply the highlights in kind of a watery line pattern. Lastly, I used Underhive Ash again and strategically applied it just to the tops of it, along the arms, heads, and tips of the wings. The end result is pretty fantastic, and even though it's the same colors I use when painting up one of my marines, it has a totally different feel. I think after I seal it up with my matte sealant, I'm going to then apply a gloss coat so it'll retain somewhat of a sheen luster to it.
The statue in the middle provided a different challenge. I had already used grey for the brick wall, and didn't want it to be the same color as the two angel statues. I don't really like mixing paints because I tend to not get smooth results (shows you how new to this hobby I still am!) so I figured I'd experiment. I used a light grey (Dawnstone) to base coat it, then washed it with a greenish brown (Athonian Camoshade). I then used the straight dark brown wash Agrax Earthshade to give the bottom of the statue just a bit more dark to it. Then I used Longbeard Grey as a drybrush all over it to pop out the edges, then went again over it with Underhive Ash again. I wanted it to still seem greenish but statue-like. Ended up pretty good!
And that still wasn't all. I used Celestra Grey to add tick marks into the statue to give it a bit of a weathered look. It's a grey that's so bright it's almost white, and is in fact what I usually use to basecoat anything I'm planning on painting white.


No comments:
Post a Comment