Monday, September 30, 2013

Testing new posting method.

Hey all. I've been running into issues with photobucket so I thought I'd utilize the blogger app to directly upload images to each post. We'll see if this works out.

Not much to update in terms of my own models, but I have been hard at work on a Captain Tycho model for my friend Layne. I have no idea how to do the backpack flag so its just the marine for now. I wanted to go for a shiny gold armor as that's what he wears in official fluff. I feel it was moderately successful.

Apologies for the lighting. My desk lamp officially broke and I am not sure how to fix it.

Monday, September 23, 2013

Nephilim Jetfighter FINALE! ... Okay, not really.

So, the jetfighter is done. It also performed very well in the first match in it's 100% painted state, blowing up a drop pod and about 4 terminators in two turns on the board.

So why do I not have pictures of it to show you today? Two very good reasons. 1: the jet itself is 100% painted, but the base is not and I want to get it done so you can see it in all my intended glory for it. 2: My newest roommate is a professional photographer! He saw me working on stuff one night and thought it'd be cool to take photos and stage some scenes with them.

I agree. Tentatively set for "some time this weekend." So I better bust my butt and get that base finished.

Too bad my figurine ADHD set in and I started work on another project of mine. It's the Sableclaw, the land speeder of Dark Angels Captain Sammael, leader of the Ravenwing. It's one of the two options he's got for you to run him as. It's also easy enough to tell whomever you're playing against "So, this is just gonna be a regular land speeder this game, so none of the weapons are twin-linked." I love getting multiple uses out of the same model.

I got the base coat done, the drybrushing to pop out the black, and a fair bit of base coating for colorful parts of the model finished like reds, metallics, whites, that sort of thing. I've also finished the face on good ol' Sammael, which is the real reason I feel like posting today. It looks good.


Sorry I kind of blew his face out with the lighting, but I'm lazy and didn't feel like spending the time setting up a good photograph on an unfinished model.

Last thought on the modeling: I'm sure you notice the red helmet on the gunner. I thought it'd be cool to make the gunner something a little more unique than just another ho-hum ravenwing marine so I made it a Techmarine. Figured the red would pop with the rest of the black on the model just like red weaponry tends to do, and I figured right.

I'll keep y'all updated!

Thursday, September 19, 2013

Nephilim Jetfighter part 2

Hoo boy. I've been at this pretty much all day. Still not done, but I'm worn out and want to get out of the house. It's far enough along I thought I'd post updates.


It's funny to me when I get to this stage and everyone is all "Oh wow awesome nice job!" because I know I've still got an hour or two to go to get it to where I like. It's all in the details.

Things left to do
  • Dirty up then highlight gunmetal bits and engine to look weathered and worn, and also brighter where it should be bright
  • Add final highlights to white parts on Dark Angels/Ravenwing Emblems and candy striping
  • Apply highlights and final silver sheen to gold emblems
  • Paint lenses to look as such, such as targeting laser sight on lascannon
  • Add red highlights to candy striping and tail fin
  • Making the base pretty
It's a lot of work to do such seemingly innocuous things, trust me. It might not add a lot over where it's currently at, at a glance, but anyone who does this stuff notices it right away. (Or at least, they notice the lack of it at current.)

I also wanted to show the missiles. Just got them finished. I realize now the little targeter looking dealies in between the missiles aren't done so add that to my list of metal bits to do.
I love the way the missiles came out, truly. Sorry for the poor lighting on them, though. I still need to set up an area and get proper lamps and such to really make the photographs do justice to what I've done to the models. A hobbyman's work is never done!

Lastly, the tailfin:

The red needs a lot of work. Looks too flat currently. Shouldn't be much longer, though!

I am off to the actual game store now for Game Night, or as the army guys call it, Man-Love Thursday. Take care everyone!

Wednesday, September 18, 2013

Nephilim Jetfighter part 1

This is a continuation of the last post, and there will be at least one more after this.

I wanted my jetfighter to stand apart from my dark talon, as I've mentioned. They are very similarly shaped after all and while there are definitely a fair number of difference between the models, I didn't want them to look just samey.

As I said the other day, I wanted WHITE wings. And trying to make it white, I couldn't make it smooth with brush strokes. So, I masked and sprayed each wing.


Used my hobby knife to cut the masking tape into shape. Was pretty easy with how the wings are raised out a bit.

Rather than go with grey granite wings, I wanted to go with a white marble look. You guys be the judge of how well I did. (I know I could do better, but I never practiced this first. Whoops.)


It still looks cool, and usually cool gets a passing grade from me. I definitely did better with the right wing (so photo left).

You can also see the start of the red/white striping often seen in the artwork in the book whenever Ravenwing are shown. Here's the example of the actual Jetfighter picture in the book. Sorry it's so tiny, but it was the only image of it I could find with a Google search. My google-fu is lacking.

I plan to keep that up all through the sections freehanded with a white stripe (so other wing and on the tip of the canopy) just like in the picture. I won't be doing the gold trim on the wings because 1) that would be a lot of work and 2) I don't like the way that'd look. I might be convinced into doing it depending on how well the striping goes, though, because it might need a bit of that shine to make it stop looking like a giant candy cane.

I also made the tip of the tailfin red with a big white strike under it. That should make it sufficiently plane-like. I am hoping my brother who's an army helicopter pilot and other brother who's an air force programmer approve.

But, alack, I am done for the day. Too tired, and it's a bit past midnight. Will try to finish it up tomorrow. Stay tuned!

Tuesday, September 17, 2013

Vehicles are a pain in the butt.

I love painting miniatures, but when it gets to doing vehicles, not so much. I don't really have the tools on hand to get through them smoothly and quickly, so they end up taking a long, long, long time.

I finished my Ravenwing Dark Talon about a month ago. It turned out pretty good, but a lot of things didn't work quite like I wanted.

As I said, I do like the end result. It's just a couple of issues. Learning experiences and all. Sometimes the best way to learn is by making mistakes.

The wings came out pretty cool. It was just a flat grey with white lightning highlights, followed up with a red wash applied as thiny as I could in streaks to give it kind of a reddish hue. I was going for a marble look and fell far short of that, but at least now I know what not to do.

The cockpit was a hit and a miss. The hit was the actual guy inside, the miss was unintentionally obscuring him.
First off, the huge thumb print on the right side of the cockpit (so, our left.) Ugh. That was a mistake while gluing and by the time the glue dried so I could actually see what a mistake I'd made, it was too late to try to go back to fix it. So what I tried to do to cover it up a bit was give the glass a green tint. I figured applying a green glaze over it would do the trick, but unfortunately it made the entire thing blurry. I had to go and use my thumbnail to scratch it off as best I could so it just left the green around the edges. Totally not what I wanted and it looks messy. I'm still bummed about it, but at least from a distance it looks okay.

The side cathedral looking statues also came out really good.
Like whenever I do stone or what I want to appear to be stone, it's simply drybrushed twice with lighter layers of the shade of grey. One of these days I'll go in and freehand cracks when I do stonework, but today is not that day. The banner across the status says "MORTIS ANGELS," just for the record. It's not my best lettering work, but it's sufficient. The other side looks nicer. There isn't the spilled red from the wire, and the lettering is more crisp.

Also, just wanted to say I'm stoked with how the engines turned out. I used drybrushing with some metallic bronzes and flat browns, then finished with a drybrush of my brightest metallic looking drybrush paint so keep the edges still appearing silvery. Gives them a burnt metal kind of look like you see on jet engines that have seen too much use and not enough care, or like on the edges of a blowtorch.
The weaponry was fun to do. I didn't pay much attention to what is oddly the most useful weapon on it, but that's because boltguns are pretty simple and basic. Plus they are hidden in a little pod so you can't see them all that well anyway.
I tried to make them appear to be glowing. The success at doing so, arguable, but you have to start somewhere, right? The Rift Cannon on the front I put some green stripes in, and the Stasis Anomaly Bomb, I tried to make it look like it was glowing with some pretty heavy bright blue lighting. The bomb came out terrific. It's a shame it's on the bottom of the model so it's not more readily available!


I tell you all these mistakes so we can see how well I don't repeat them on my Nephilim Jetfighter. It's currently pretty much just basecoateded in black though I did throw down some metal engine basecoating and got some white on the wings. The white, however, is not very smooth so later today, I plan to pick up some white spray paint, mask out the wings, and make it really smooth. Should look great.

Just for the same of comparing to when I get the whole thing finished, here's my current Nephilim Jetfighter.
I know the picture quality there is rubbish but it's a work in progress shot so I'm not too worried about it. :D
You can still see what I mean about the white not applying smoothly. In the corner of the wing, you can see me attempting to go from my basecoat of Celestra Grey to Ulthan Grey, and the results are pretty disastrous. I just can't get white to apply smoothly on flat surfaces. It's fairly easy to do it on figurines as they have all sorts of contours that help hide brush strokes, such as on the pants of my "Horace Action Jackson" reaper miniature.

Hopefully I'll have updates of my jetfighter later on today, time permitting!


Friday, September 13, 2013

Welcome to my Miniatures blog!

I'd been meaning to get around to this for awhile, so here it is, my own bloggy blog with my miniatures work. :)

A little about me: I got into Warhammer 40,000 in October-ish of last year. It's something that had always intrigued me, as I loved the universe as presented by the Dawn of War and Space Marine video games, and painting little plastic figurines seemed like it'd be really fun. The reason for my delay in launching this blog is two-fold: I was not in a stable living situation, and I was also learning how to do it on a professional level, honing my skills til I felt comfortable enough I'd actually be able to get hits and get subscribers. Alack, the internet age.

There's always room to learn, and that's HOPEFULLY a lot of what my blog will be about. If I learn new techniques, which I will considering I've only been at this for about a year, I will do my best to present it to you all in a way that teaches and shows you the struggles of doing for the first time as an aspiring professional myself.

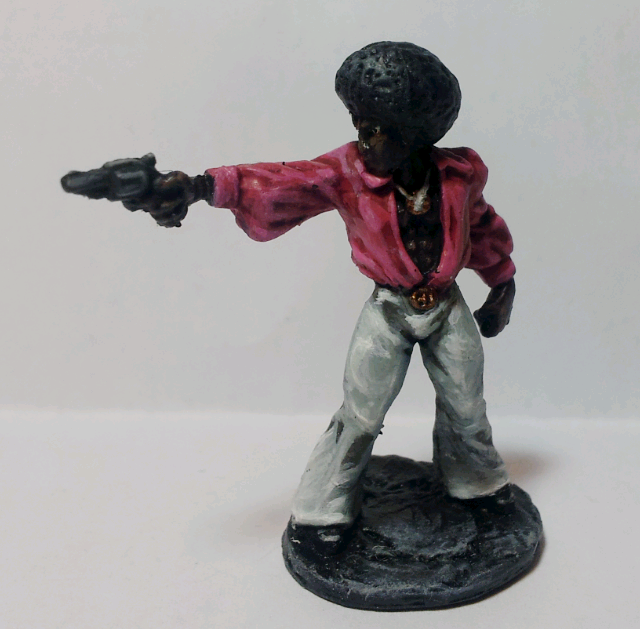
If you want to commission anything, anything at all, e-mail me at lantz.casey@gmail.com. I work cheap! Making a living is hard! Prices negotiable, and I usually charge about $15 for your typical 15mm scale miniature. I actually enjoy painting things for others way more than working on things I personally own. Watching someone's face light up as I present them with ultimately what captures their imagination is a great feeling.

And now on to my latest work!


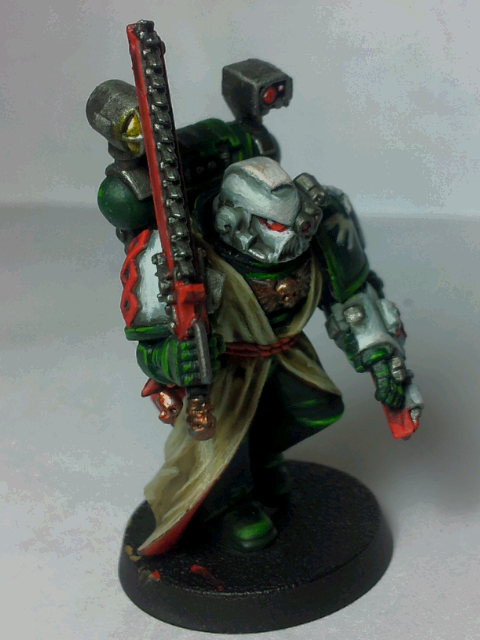
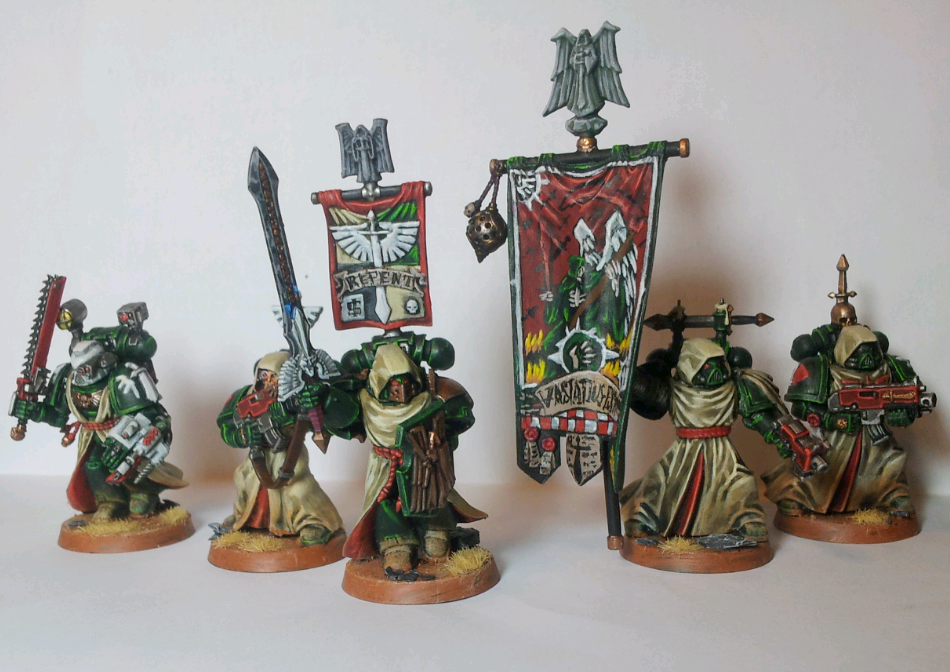
I've been quite busy painting my Dark Angels command squad recently. After a 2000 point game against my Black Templars playing friend, my love of the game motivated me to get back to doing things for myself. My command squad was actually 3/5ths finished already, it was just the Apothecary and Champion still to go, but busy life got in the way.


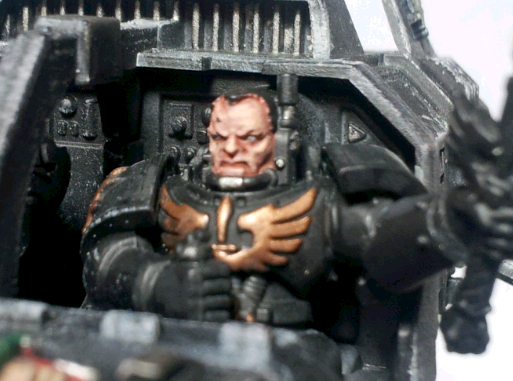
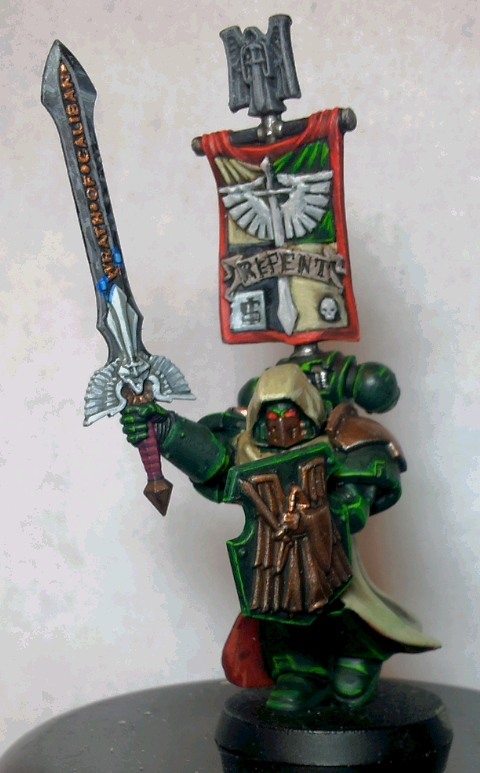
Couldn't be happier with how they came out. I hadn't ever tried to paint white on armor before (I'd only ever used it as a highlight in sparing use like the angel on the sword of my champion) so seeing it turn out like that makes me happy. Also, I finally have a brush that's not falling apart on me that's also needle small enough I can comfortably do tiny detail work, like the glint of white light on anything glass (the eyes of the Apothecary being the best example you can see here) and writing lettering like the REPENT on the Champion's banner.

The champion's banner, by the way, took as much time as the entire rest of the miniature combined. The dark angels symbol was part of the casting of the model, and it also had the little skull and little extra box in the two corners. I had to quarter the inside myself, couldn't be happier with how that turned out. It's almost to the point I want to revisit the knee pads of my original squads I painted up now that I can quarter things free-hand like that, but I kind of like not going back to older models and letting their original paint jobs stand where they are. Lets me show people how far I've come, you know?

And I know some people are probably saying, "But Casey, those are not finished yet." And you're correct. Those are simply the immediate-aftermath-painted pictures I always take.

I decided to do the basing together as a whole squad, and then just take one photo of them all grouped up.


Here's the whole squad together. Mmmm, lovely. They look proper dire and angry, as any good space marine should.
Basing is pretty simple, really. At least to the degree to which I do it. I don't like overly complicated bases at least for models that see play on the table. All I do is paint on some dirt, drybrush it with a bone-light shade and then a light-green shade (Terminatus Stone and Underhive Ash respectively out of the Citadel paint line), and then glue on some dead grass flock, and little cracked slate. After that dries, I paint the rocks with my darkest grey, then apply a black wash, then highlight with a single bright shade of grey. Simple, effective, easy to do, and it looks like the deserts of my home in Nevada.

Something that's kind of fun to do and you can see it prominently on the Champion, drybrush on the colors used when painting the bases. It makes the boots look muddy/dirty, etc. I also did it with the robes as they would be dragging through it to.

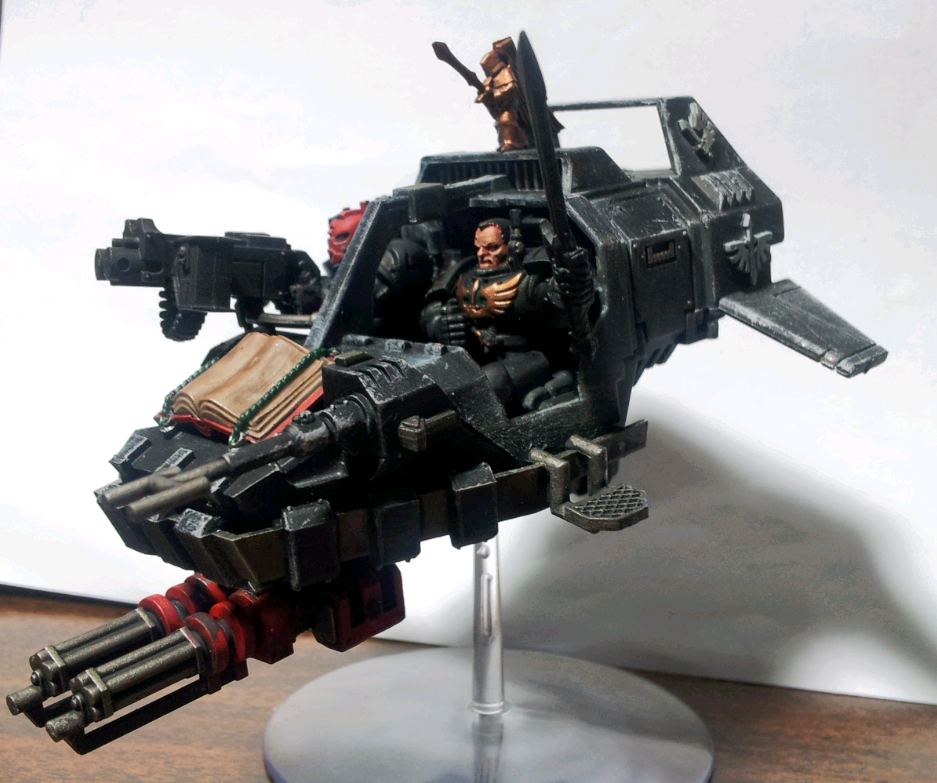
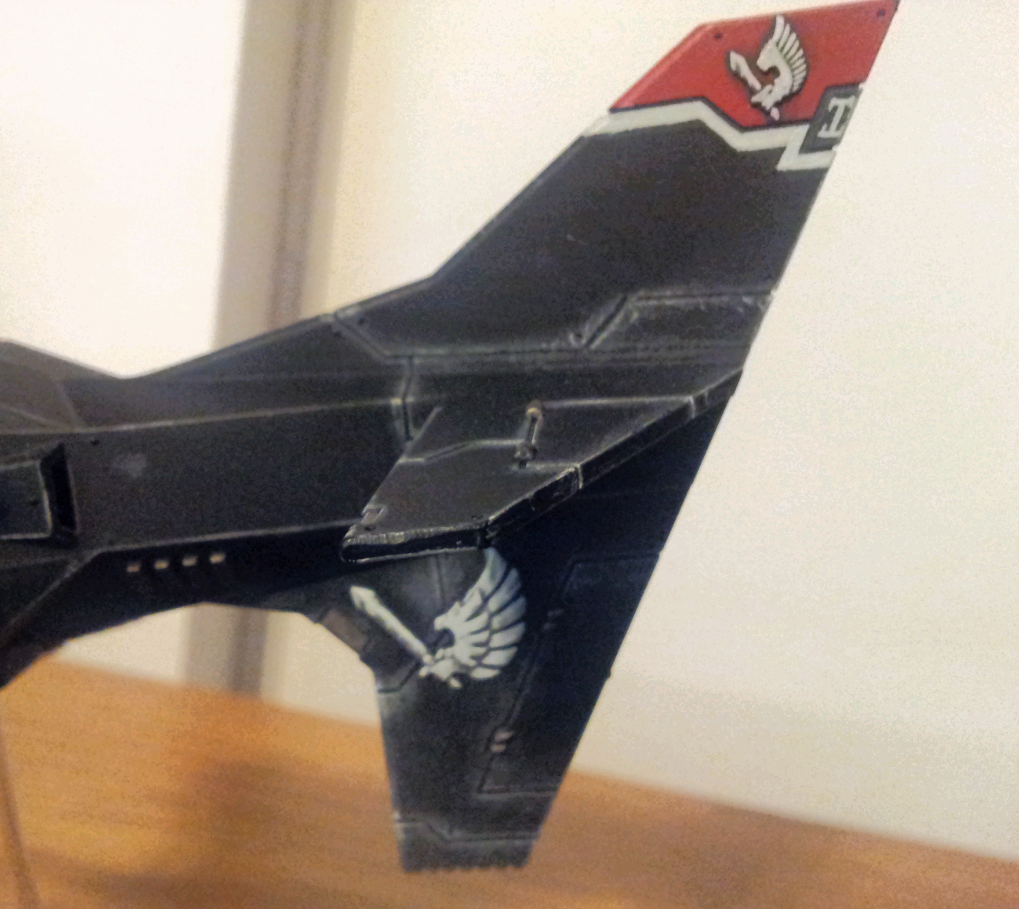
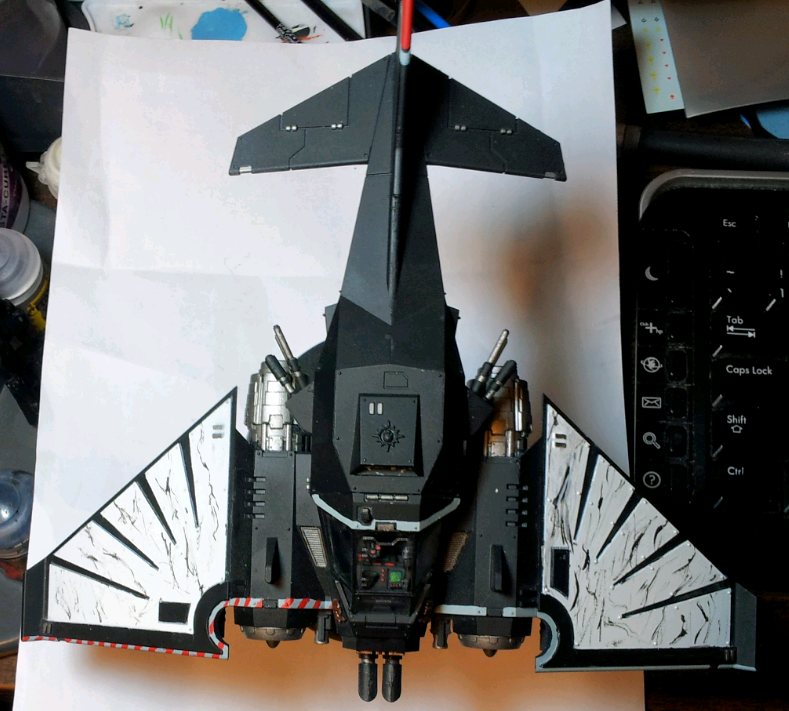
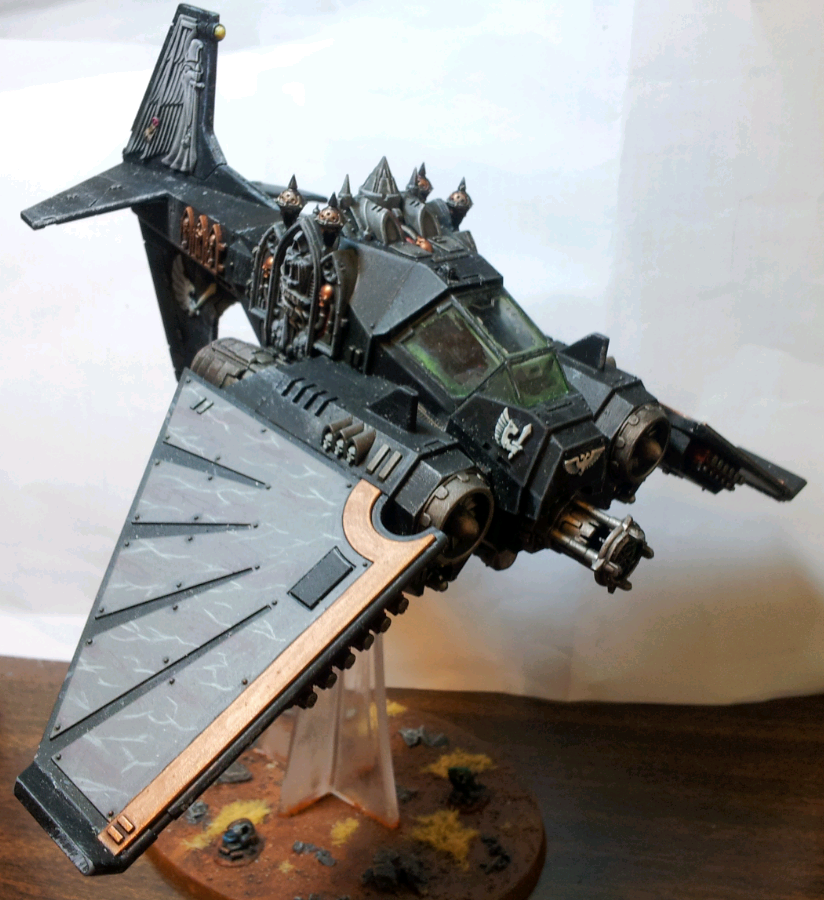
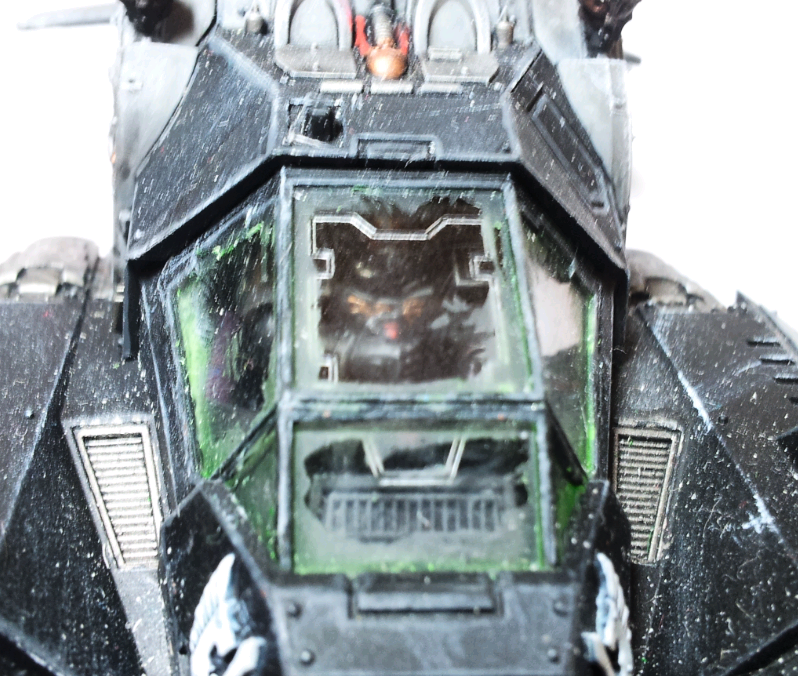
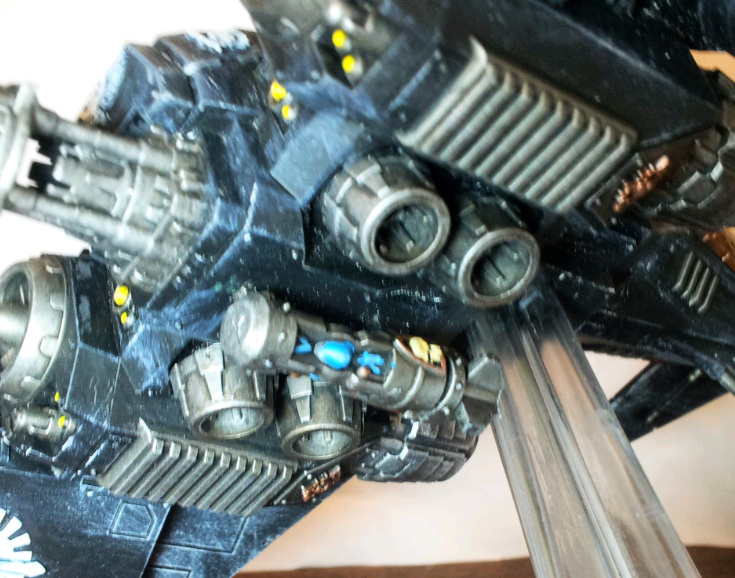
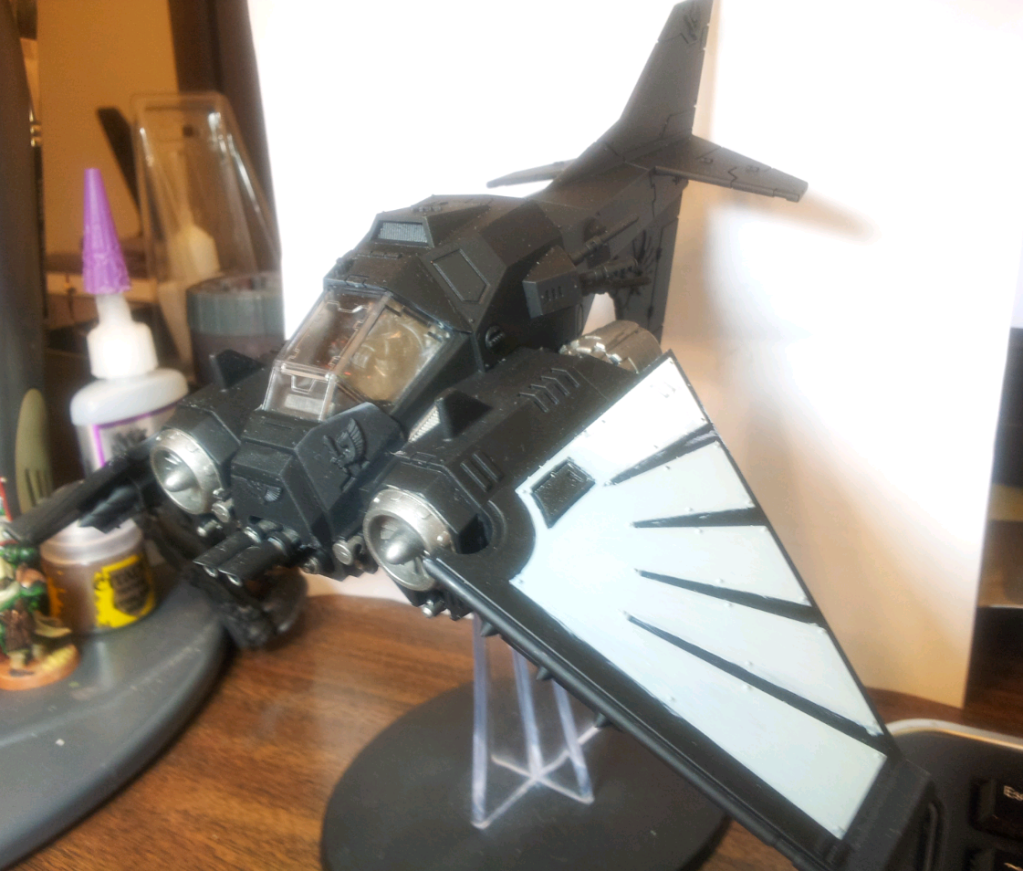
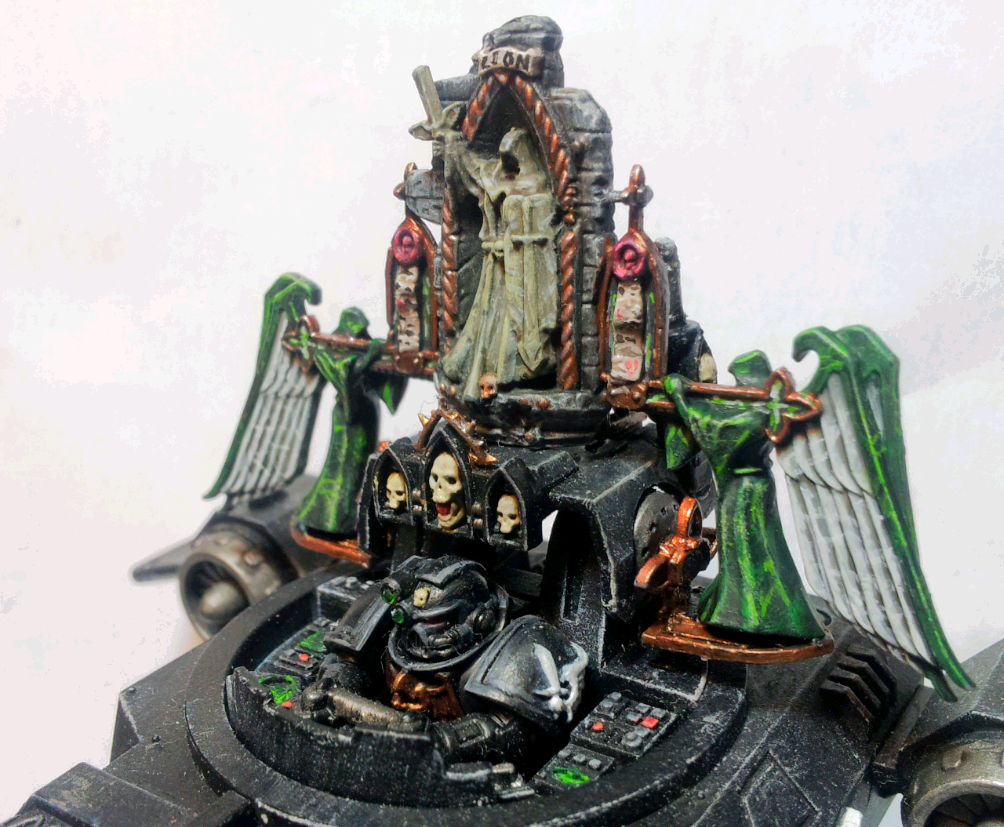
Finishing the squad felt good. I think the rest of them were sitting around for about two months, waiting for their brethren to join them as completed models. Then I realized I had another model that was unfinished! Awhile ago, I bought the "Land Speeder Vengeance/Darkshroud" box and magnetized it to run as either option. I never did get around to finishing the Darkshroud's "Icon of Old Caliban" which is basically a giant statue thingy on the back of the model. It's pretty ridiculous-looking, but I love it. My friends and I refer to it lovingly as the Battlepulpit.

And now it's painted and sexy-like.

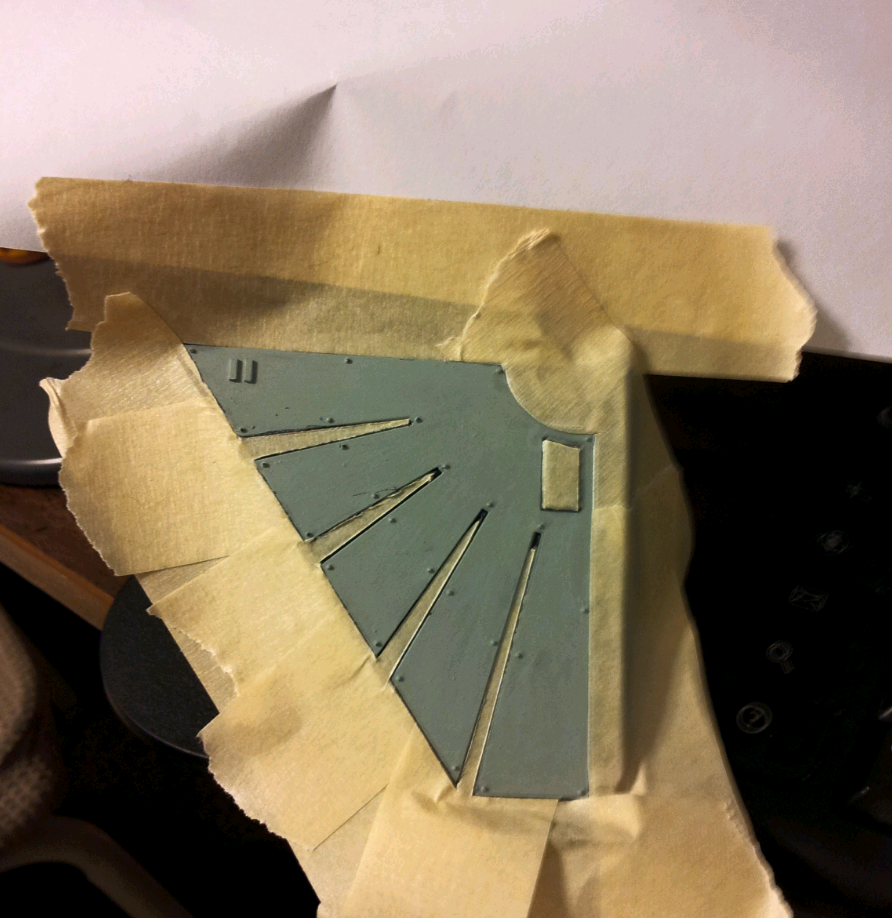
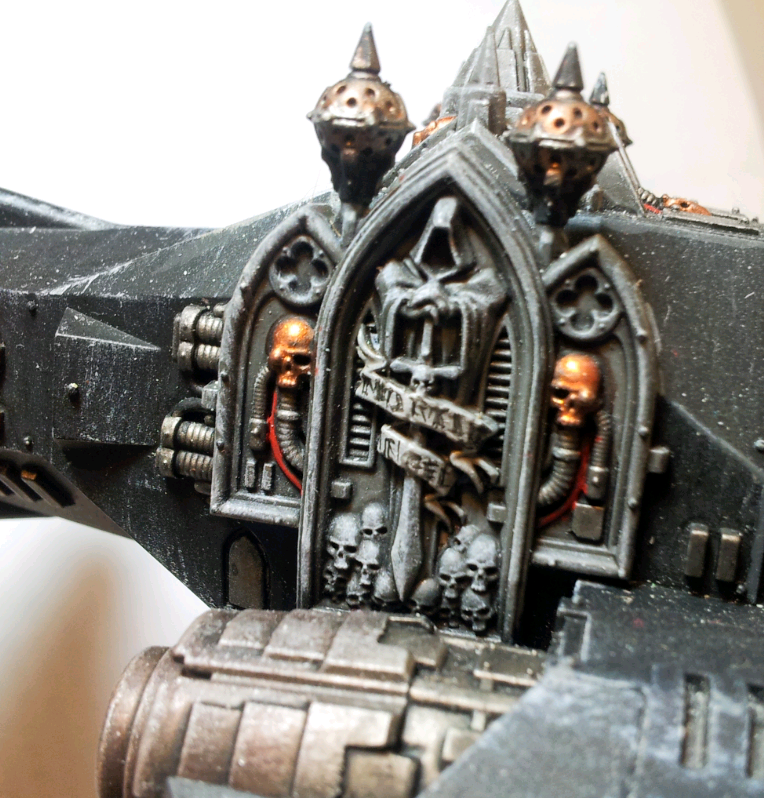
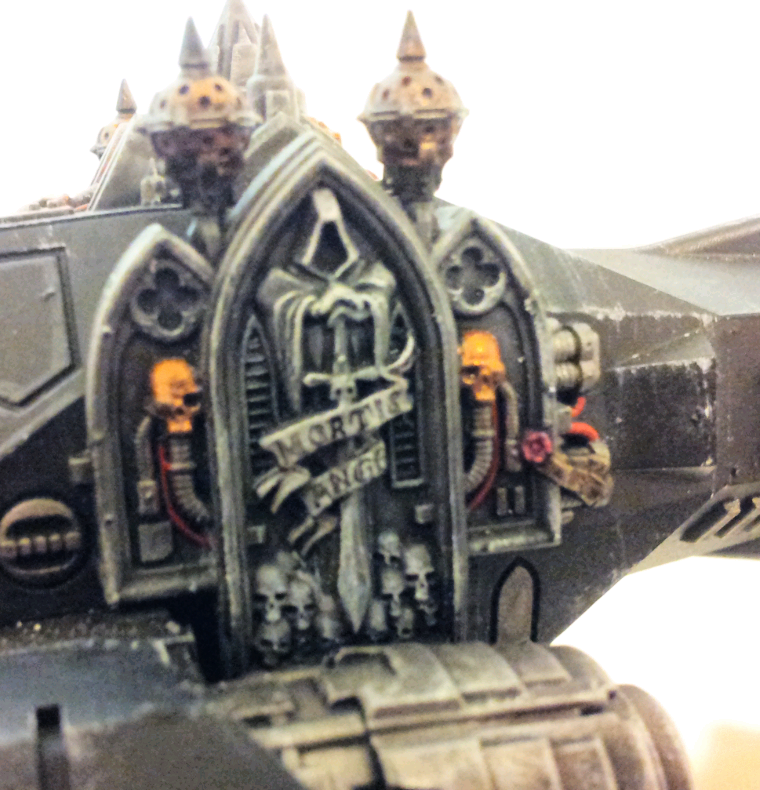
I absolutely love how this came out! I wanted the angel statues to look like Jade or Marble. First thing was to make sure it was DARK so I applied two coats of black wash to the angels after I painted it with my darkest green (Caliban Green for those familiar with the Citadel line), so I applied a lot of streaks of the brightest colors I used outside of where I'd normally apply the highlights in kind of a watery line pattern. Lastly, I used Underhive Ash again and strategically applied it just to the tops of it, along the arms, heads, and tips of the wings. The end result is pretty fantastic, and even though it's the same colors I use when painting up one of my marines, it has a totally different feel. I think after I seal it up with my matte sealant, I'm going to then apply a gloss coat so it'll retain somewhat of a sheen luster to it.

The statue in the middle provided a different challenge. I had already used grey for the brick wall, and didn't want it to be the same color as the two angel statues. I don't really like mixing paints because I tend to not get smooth results (shows you how new to this hobby I still am!) so I figured I'd experiment. I used a light grey (Dawnstone) to base coat it, then washed it with a greenish brown (Athonian Camoshade). I then used the straight dark brown wash Agrax Earthshade to give the bottom of the statue just a bit more dark to it. Then I used Longbeard Grey as a drybrush all over it to pop out the edges, then went again over it with Underhive Ash again. I wanted it to still seem greenish but statue-like. Ended up pretty good!

And that still wasn't all. I used Celestra Grey to add tick marks into the statue to give it a bit of a weathered look. It's a grey that's so bright it's almost white, and is in fact what I usually use to basecoat anything I'm planning on painting white.